 |
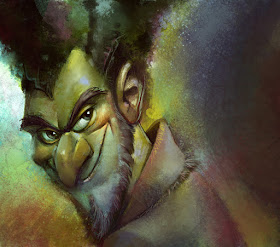
| I wondered what would happen if I used every brush in one image. I guess this is the answer. |
If you are a long-time Photoshop user, this will be a boring post for you. But if you recently made or are making the switch, then it might help. In order to make the transition to Photoshop, I had to change how I think about and use brushes. These are the categories that I find useful for everyday painting:
Drawing: brushes that work well at small scales and for details
Gradient: brushes that are good for making a smooth shift in colors with minimal "banding"
Edge: brushes that can easily create an edge
Blending: smudge tools that help smooth banding or introduce distortion to smooth areas
Texture: brushes that create strong textures
Feature: brushes used as a shortcut to create specific things (ie. trees, chains, windows, etc.)
I'll talk about each of these separately, except feature brushes, since they are so highly customized. I've included a link at the bottom with the brushes I used in this post. Copy the file into the appropriate photoshop\presets\tools folder and you can access it from your Tool Presets window/menu. I like tool presets because they contain all of a tool's information (not just stuff in the brush menu) and can be used for things like the smudge tool.
Drawing Brushes:
Photoshop does a very poor job with brush scaling. Brush dabs made at a certain size look mushy when scaled up or down very far. This is especially problematic with brushes you want to use for details, so you need brushes suited to that purpose. None of my drawing brushes are exciting, but they get the job done.
Gradient Brushes:
Photoshop's airbrush does a good job with smooth gradients, but if you want something with just a little more meat and interest, there are a variety of brushes that allow you to go from fully transparent to fully opaque with very little banding (sudden jumps in color/value). Turn down the opacity enough and lots of brushes can work fairly well for this, but sometimes it's nice to have a brush you can control to full opacity using pressure. The most important brush here is the Rounded Airbrush. It has a falloff that matches the falloff of light on a rounded surface, and it feels just like my modified 2b Pencil brush from Painter. I created the Rounded Eraser from the same dab (also in the tools below) and it works just like the Eraser brush from Painter (try it and you will see why it is awesome).
Edge Brushes:
 |
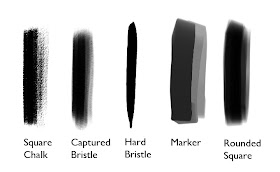
| Square Chalk from Blur's Goodbrush set, link above |
I like brushes that allow me to get a strong edge, and with a few exceptions, gradient brushes are bad at that. Painter had various brushes that could do both, but Photoshop's brush engine seems to resist giving me that same seamless control. My versions of the Captured bristle and the Rounded Square can be used both for gradients and for edges, if not perfectly. This Captured Bristle, by the way, is based off my favorite brush from Painter, the Captured Bristle Acrylic. It's not as good, but this brush makes me miss it less. These hard-edged brushes become surprisingly useful when paired with blenders, the next category.
Blending Brushes:
 |
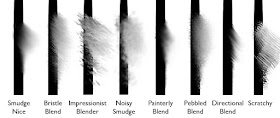
| Some of these have been modified from other sets, but I don't remember well enough to track them down. Sorry. |
Sometimes I just can't avoid banding, or sometimes I don't want to worry about smoothness while I lay down color. Other times I want to introduce texture or variation to the image using the colors already there. Photoshop's smudge tool is pretty good for this, but is very limited. I assume the Adobe team turned off the texture and dual brush controls for speed, but missing those controls means you have a limited number of stroke types. If you are used to the control of Painter's brushes then the smudge tool is an extra step, but you can get some nice effects with it anyway. My favorite of these is Smudge Nice, and I use it for almost everything.
Texture Brushes:
I hardly ever use these for painting, only for adding interest and variety. These brushes don't have very good edge control. This requires either accepting the loss of control, or using selections or some other method to add boundaries to your paint area. Dual Brush combinations can add some edge control, but may introduce other issues. I do like how brushes like these can quickly hide the digital feel you sometimes struggle to get away from in Photoshop.
Download my tool presets
here (installation instructions above). I'm going to do another post later with my CS6 brushes, which include some more interesting options.


